Getting started
Getting started with Atiéndalo
Updated on Wednesday 30 September 2026
Set up your shop and make your first sale in under 15 minutes.
Welcome to Atiéndalo. This guide takes you from a freshly created account to your first sale. Five steps, and none of them asks you to install anything.
Your account
To create your account you only need your shop’s name, your name and your email. No password is asked for.
- On the sign-up page fill in your shop’s name, your name and your email, accept the terms, and press Create my account.
- We send you an email. Nothing has been created yet: the shop is born when you open the link.
- Open the link (it lasts one hour). That’s where your shop and your login are created, and you’re taken straight in. If you read the email on another device, type the 6-digit code it carries on the Check your email screen you left open.
To come back, type your email under Sign in and press Send me the link. The link that arrives lasts a day and burns on use. The same email carries a 6-digit code for when you read it on another device: type it on the Check your email screen of the browser where you asked for it. It lasts 20 minutes and only works there.
If you’d rather have a password, create one in My profile with Create password. You need one to change your email, transfer the shop to someone else, or close it. Your name, your language, your email and your open sessions are handled in the same place: Your profile.
The first-steps list
Signing in lands you on Home: at the top, the list of what’s still missing before you can charge; below it, a door to every screen of the shop. The list ticks itself as you go and disappears once you finish it; the doors stay, and the logo in the menu always brings you back. The day’s summary lives in Today.
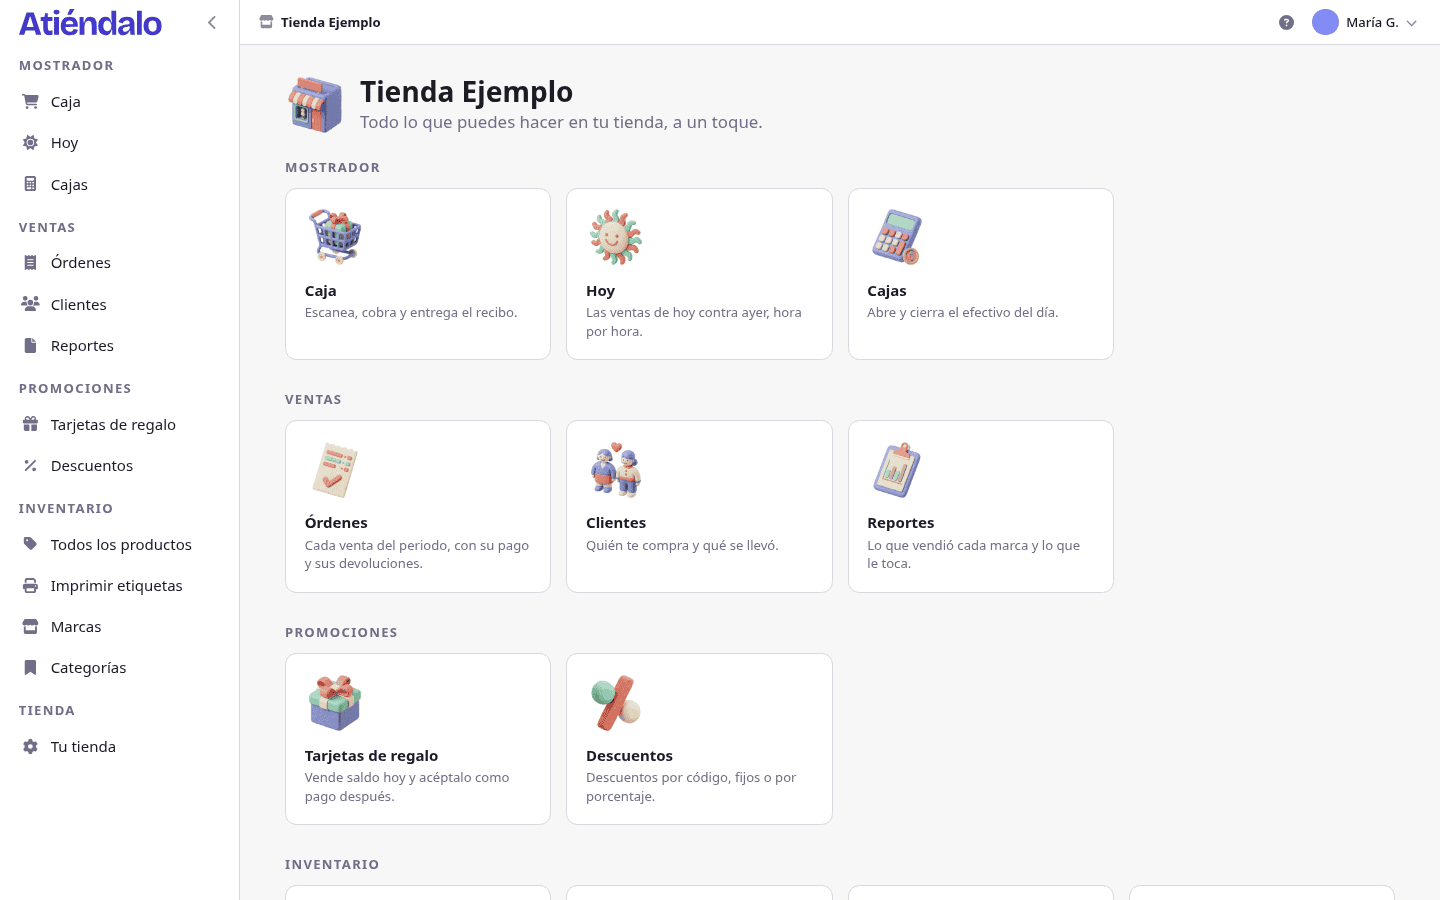
The steps are: register a brand, add a product, print labels, open the cash register (only if you enabled it) and make your first sale.
If you’d rather explore before entering your own data, Load sample data fills the shop with made-up brands, products and sales. It only shows up while the shop is empty. When you want to start for real, Delete sample data leaves the shop clean and keeps your users.
1. Set up your shop
Your store is split into sections. Before selling, review three of them:
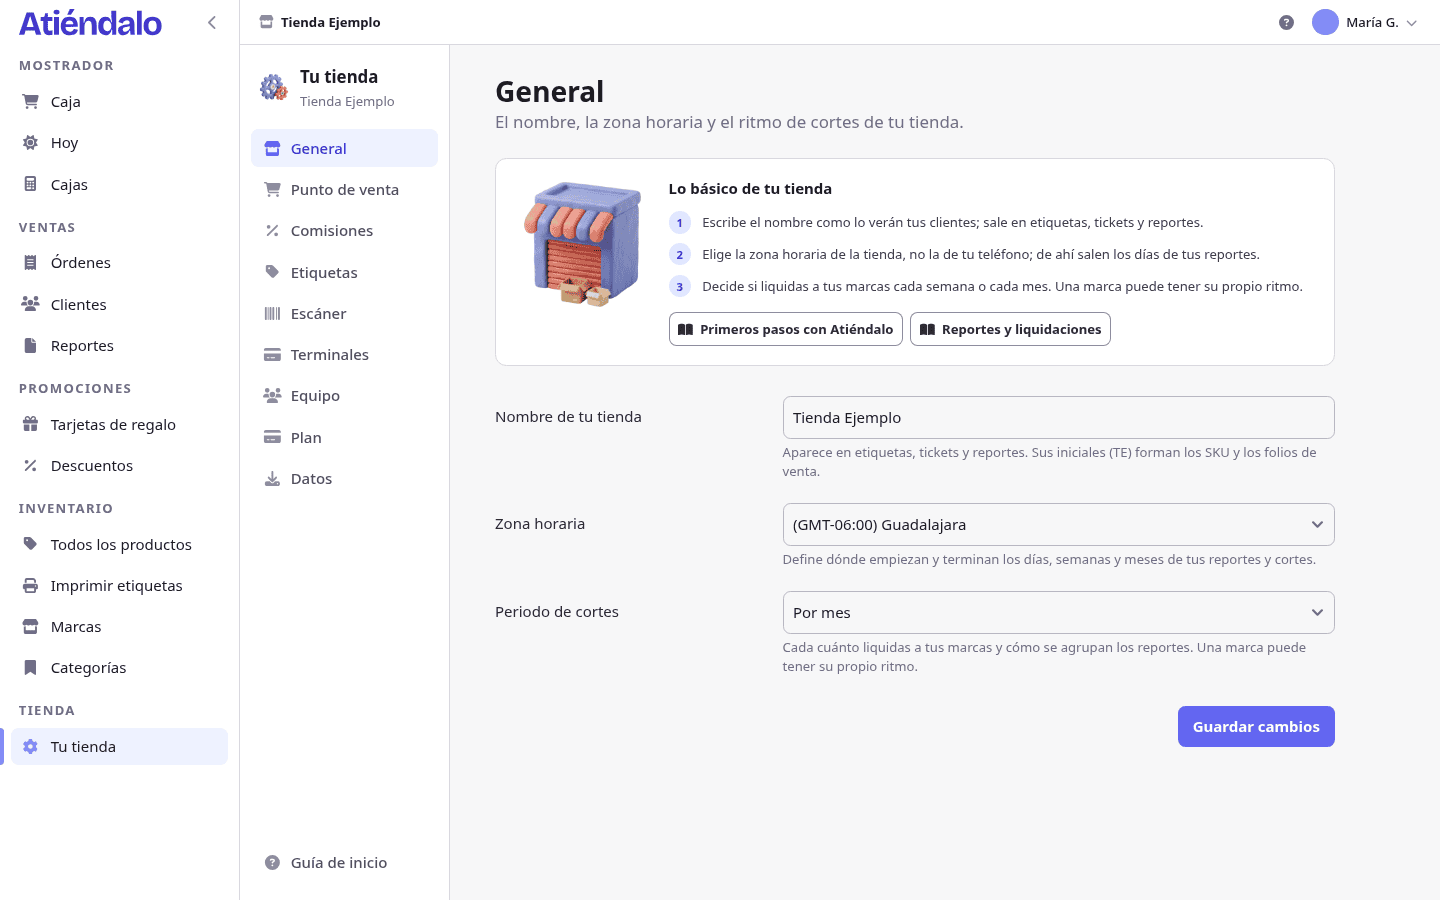
General
- Shop name — appears on labels, receipts and reports. Its initials form your product SKUs and your sale IDs.
- Time zone — defines where the days, weeks and months of your reports and closings begin and end.
- Settlement period — weekly or monthly. How often you settle with your brands and how reports are grouped. A brand can keep its own rhythm.
- Stock mode — flexible charges even when the product is at zero and lets stock go negative; strict won’t let a product with no stock into the sale.
- Cash register — when on, you can’t charge without an open register. Each shift opens with a float and closes with a count.
- Gift card expiry — how many months a card is good for from the day it’s sold.
- Card commission — the percentage your terminal charges you (3.5% by default). It’s deducted from what the brand gets paid, never added to the customer’s total.
- Sales tax — 16% by default. It applies on top of the card commission.
2. Register your first brand
Brands are your suppliers: the people or businesses whose products you sell.
- Open Brands and press Create a brand.
- Enter the name and contact details.
- If you work on consignment, set its Consignment (%) — your cut of each sale — and, if you rent them a spot, their Monthly rent.
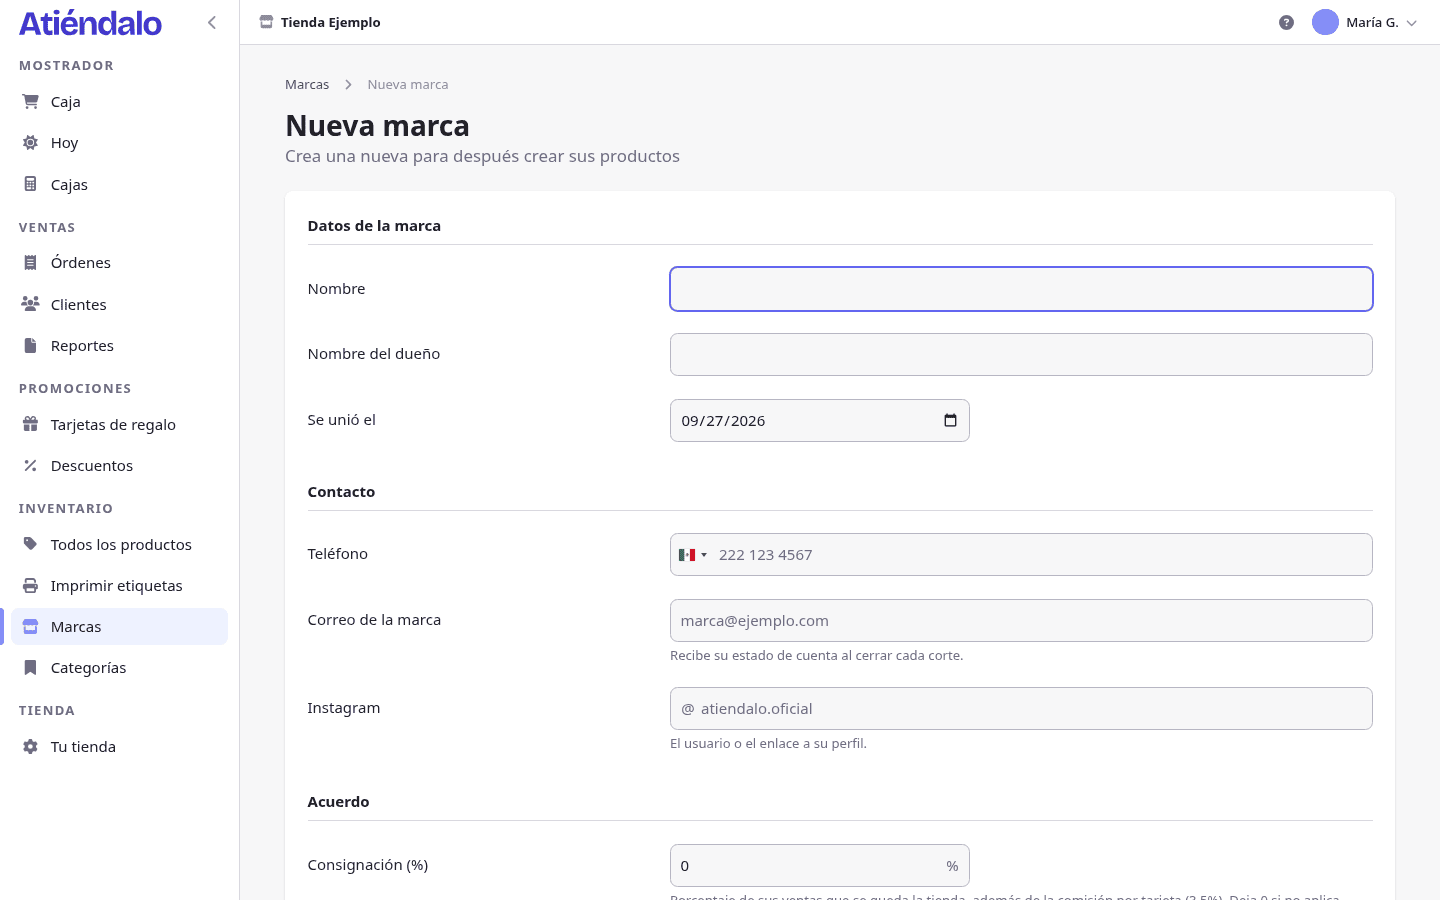
Every field is explained in Brands & suppliers.
3. Add products
Inside the brand, create its products with a name, price and initial stock. On save, Atiéndalo generates by itself:
- A unique SKU (your shop’s initials + brand + number).
- A SID, that item’s short number within the brand.
- A print-ready EAN-8 barcode, if you didn’t enter the manufacturer’s one.
If the merchandise already arrives labelled from the factory, enter that code and its type: Atiéndalo validates the check digit and that it isn’t duplicated. See Products & SKUs.
Already have your brands and products in Excel, another system or a PDF? Upload them instead of entering them one by one: Importing your inventory.
4. Print labels
The barcode label is what makes charging and counting take seconds.
- Open Print labels in the menu.
- Pick the day’s stock receipt (or the products you want) and press Print.
- In the dialog check the size and the copies, and send the PDF to your printer at 100%, never “fit to page”.
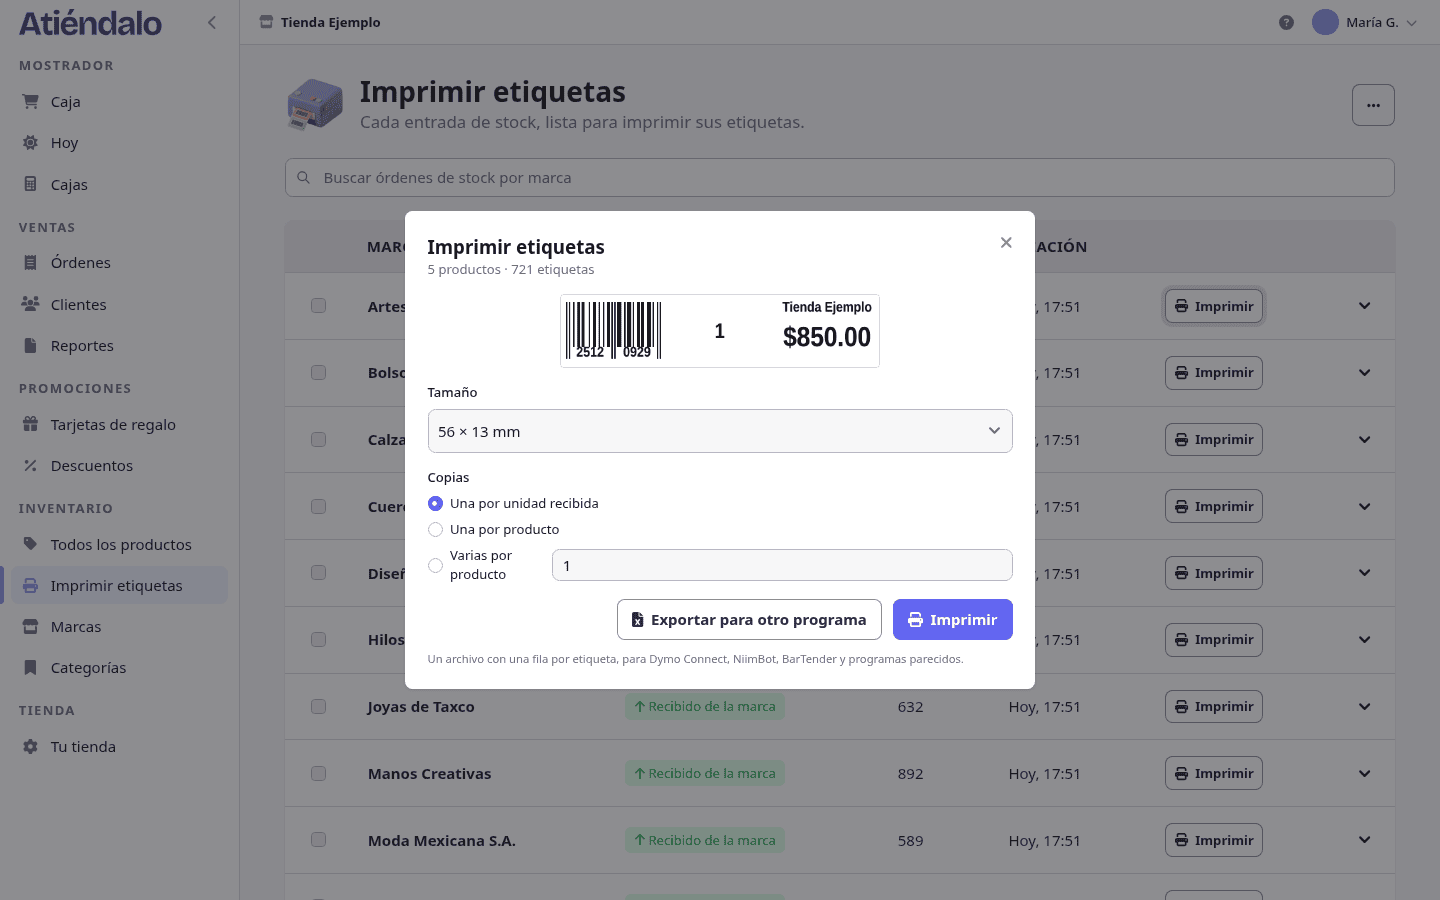
If this is the first time, print the test label from Your store → Labels first and measure its 10 mm ruler. The whole recipe is in Labels & printers.
5. Make your first sale
- Open Checkout.
- Scan the product’s label, or search it by name, SKU or code.
- Press Continue to payment, pick the method and confirm with Confirm the order.
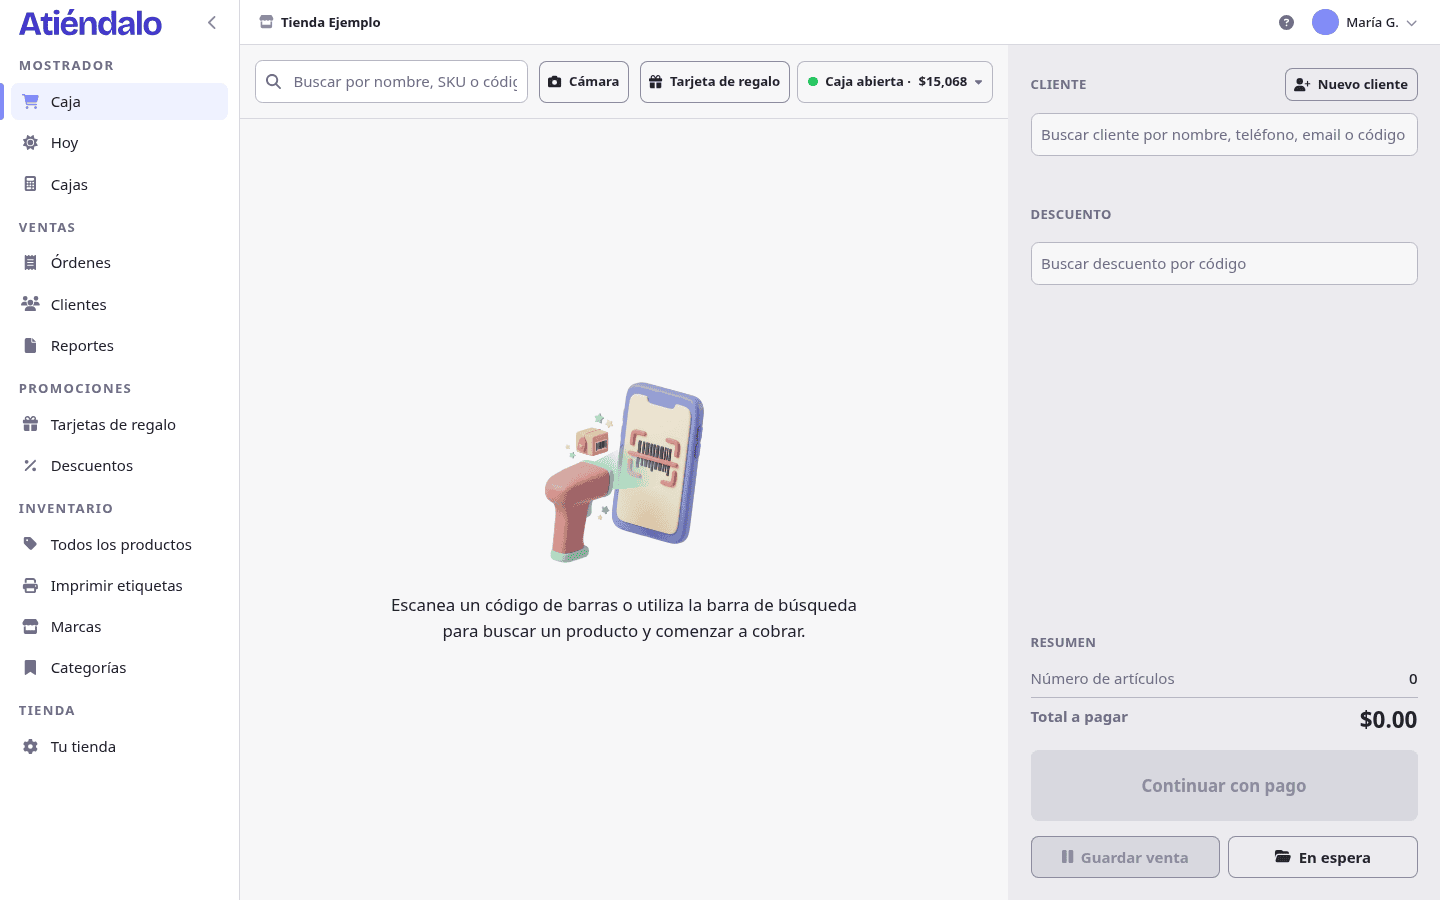
The sale is recorded under whoever made it, stock is deducted automatically, and the brand’s share is already worked out.
What’s next?
- Invite your team as admins or staff.
- Enable the cash register if you handle cash.
- Get the scanner ready before your first busy day.
- At the end of the period, check the reports to pay each brand.
- When you want to fine-tune the shop, export everything or close it, every settings section is explained here.
What can go wrong
- The sign-in email never arrives. Check the spam folder and that the domain is the one you typed. The “Check your email” screen has an Ask for another link button; each link lasts a day and burns when used, together with any others you asked for.
- You opened the link and it says it’s no longer valid. The sign-up link lasts an hour, the sign-in link a day, and both are single use. Ask for another one from Sign in.
- “Load sample data” isn’t there. It’s only offered in an empty shop. Once you have a brand, a customer or a sale, the button goes away: the shop is really yours now.
- You can’t charge and it asks you to open a register. You turned the cash register on in Your store → Point of sale. Open one in Registers, or turn the option off.
- A product won’t sell for lack of stock. You’re in strict stock mode. Register the incoming stock or switch to flexible.
- The SKU initials aren’t the ones you wanted. They come from the shop’s name. Fix the name in Your store → General: existing products keep their SKU, new ones use the new initials.
If you reached this guide before creating your shop, the Features page walks through what Atiéndalo does, screen by screen.