Inventory
Physical inventory counts
Updated on Friday 18 September 2026
Audit each brand's real stock by scanning product by product.
A physical inventory count (an inventory check in the app) compares what the system says you have against what is actually in your shop. Atiéndalo makes it fast: you scan product by product and it keeps the tally.
It is done per brand, not for the whole shop at once, so one person can count a slot while the register keeps selling.
Starting a check
- Go into the brand from Brands and open its Inventory checks tab (go straight there).
- Press New check.
- Review the date and, if you like, leave a note. The screen tells you how many active products and how many units you are about to count.
- Press Start check.
At that moment Atiéndalo freezes the brand’s list of active products with their expected stock, including the ones at zero (so you can record surplus). That snapshot is never re-synced: if a piece sells while you count, the expected figure does not move — which is exactly what makes the comparison trustworthy.
Counting by scanning
With your barcode reader, scan every physical piece. Each scan adds one to the product’s actual count, and scanning the same product again accumulates.
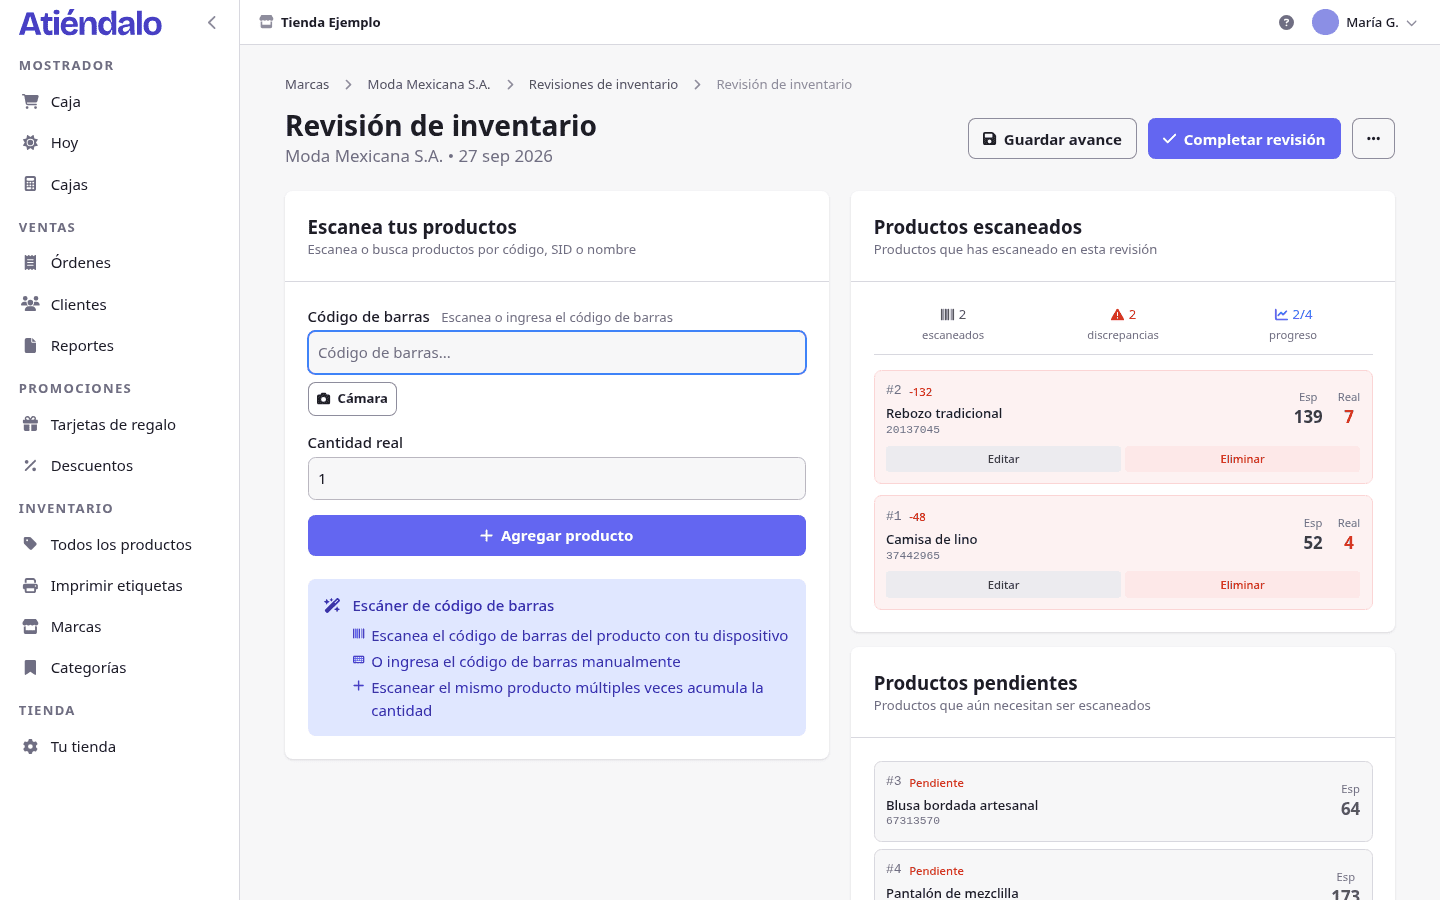
- The cursor lives in the Barcode field. Scan and move on; you don’t have to touch anything between pieces.
- With no reader, type the code and press Enter, or use Camera to scan with a phone.
- The Actual quantity field starts at 1 and returns to 1 after each scan. Change it before entering the code to add several pieces at once, and press Add product.
- Only exact matches on barcode, SID or name are accepted. There is no partial search on purpose: “shi” must not count a shirt when the shelf also holds shirts and shift dresses.
- Save progress leaves the draft on the server. You can close the tab and carry on from another device.
- When you are done, press Complete check. After that no more scanning is possible.
Results
Once the check is complete, Atiéndalo shows the summary and three lists: products with discrepancies, products that match and products you never scanned.
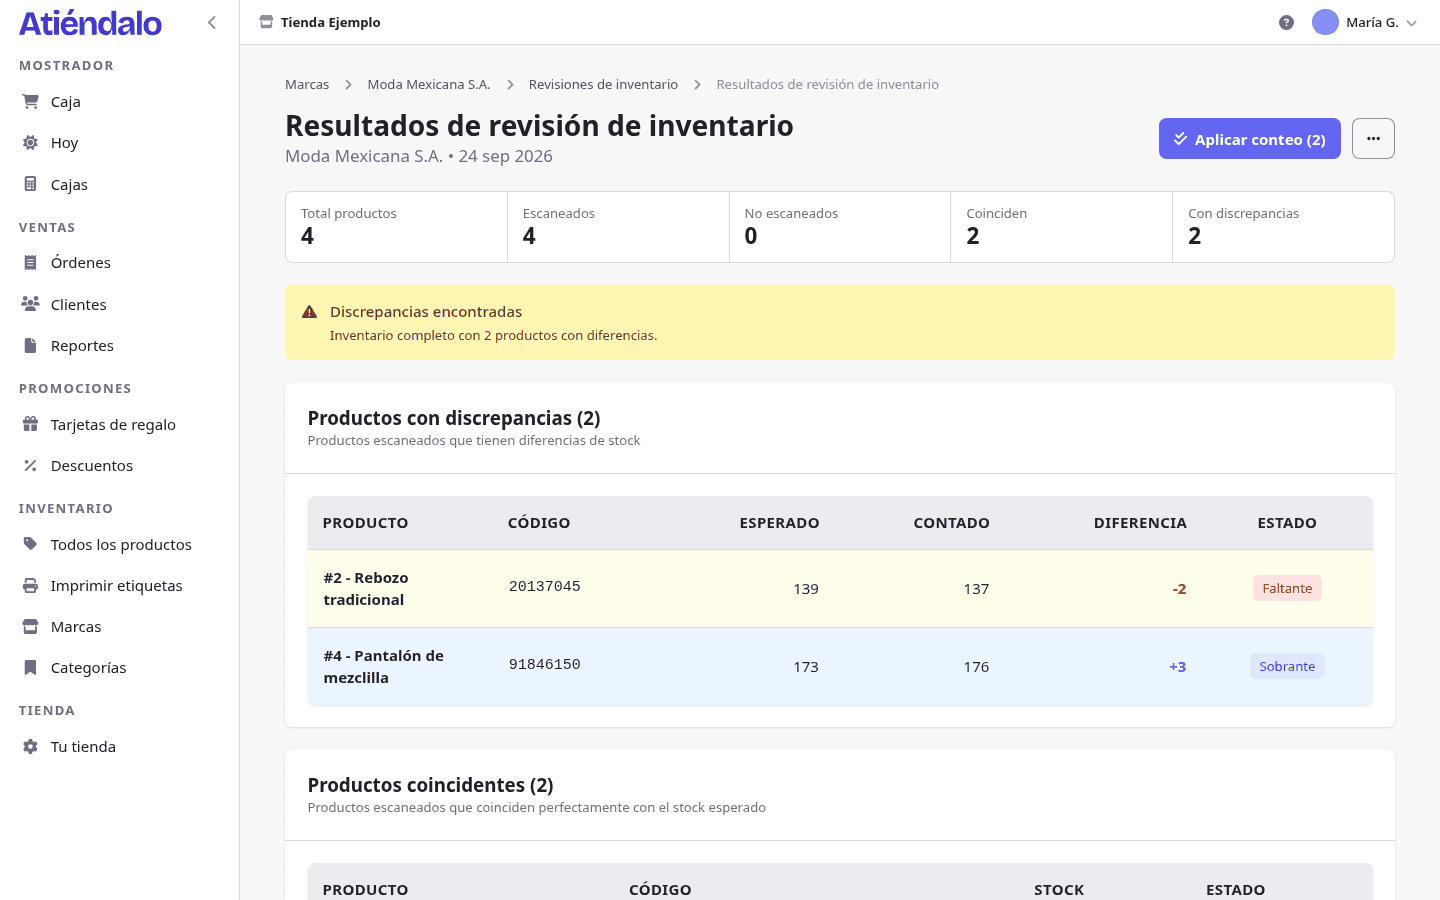
Per product you see Expected against Counted and the Difference, flagged as Shortage (sold or lost without being recorded) or Surplus (there is more than recorded).
Checks keep a copy of the product’s data (name, price, code, SID) as of the audit, so the history stays accurate even if you change prices or names later.
Applying the count
A check does not change stock on its own: it is an audit. Once you have confirmed the differences are real:
- On the results, press Apply count.
- Confirm.
Atiéndalo creates an adjustment stock receipt with the reason Count adjustment (negative for shortages, positive for surplus) for every product with a difference, and stock ends up equal to what you counted. The View stock adjustment button takes you to that document.
Rules worth knowing:
- Products you did not scan are left alone.
- A count is applied only once, and only an admin can apply it or delete the check. Your register staff can do the counting.
- If sales happened while you counted, that’s fine: the adjustment uses the difference between expected and counted, not current stock.
What can go wrong
- “Product with code … not found”. That code does not belong to this brand, or the product was created after the check started (the list is frozen). Note it aside, finish the count and record it with a stock receipt.
- Everything shows as a shortage. You counted only part of the slot. Products you never scanned end up in their own list and are not adjusted; the ones you did scan but left a box uncounted come out short. Count again before applying.
- You applied the count by mistake. It cannot be undone from the check. Fix it with a stock receipt in the opposite direction, with the reason Count adjustment, so the history explains what happened.
- The “Apply count” button isn’t there. Either the check isn’t complete, or it was already applied, or your user is not an admin.
- The product you created mid-count doesn’t show up. That is correct: the snapshot is taken when the check starts. Run another check when you want to include it.
- You lost your progress when the tab closed. Only what wasn’t saved is lost: use Save progress now and then on a long count.