Inventory
Stock receipts
Updated on Wednesday 30 September 2026
Record the merchandise you receive from each brand and keep your inventory current.
Every time a supplier delivers merchandise, record it as a stock receipt. It is the only document that raises inventory, and it is also the one that tells you how many labels to print.
Recording a receipt
- Go into the brand from Brands and open its Stock movement tab.
- Press New stock order.
- Pick the Reason: Received from brand for new goods, Count adjustment or Write-off for corrections.
- Add the products and their quantities (see the next section: scanning is the fast way).
- Optionally write Notes (delivery note number, who handed it over).
- Press Create Stock Order.
Every product’s available stock updates immediately.
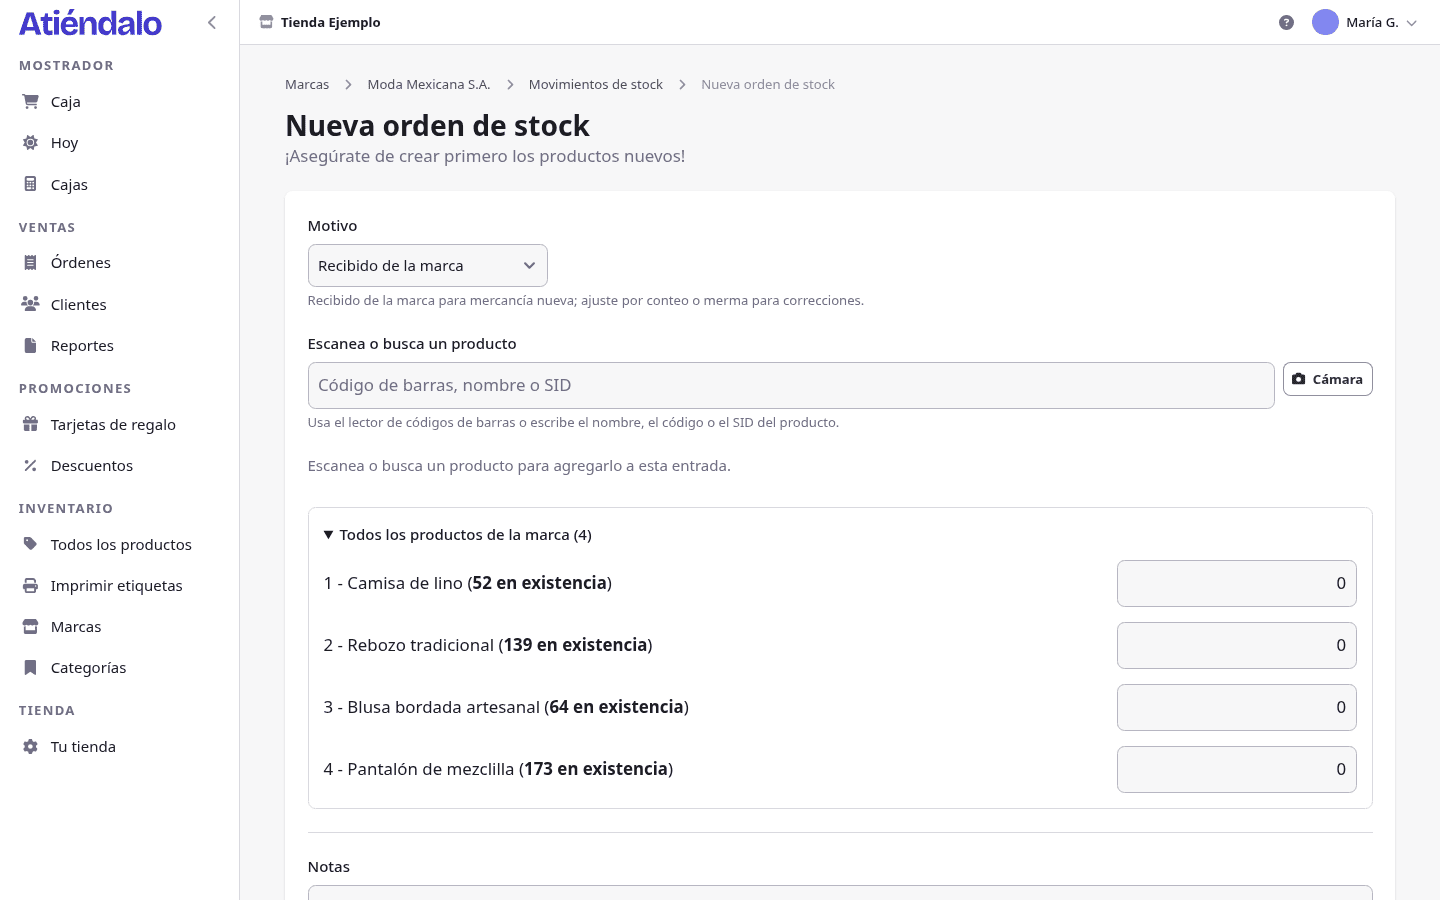
There are shortcuts too: the New stock order button on the brand’s Products tab, the New stock receipt action on Today, and each product’s Stock button, which opens a small window with Units coming in and adds those pieces to that brand’s receipt for the day (creating it if needed) instead of opening a new document per click.
Receiving with the scanner
The fast way to receive a box is to scan every piece. At the top of the form there is a search box (Scan or search a product): fire the reader at the barcode and the product appears as a line with quantity 1; scan it again and it goes to 2. The cursor stays in the search box, so you can scan one piece after another without touching the keyboard.
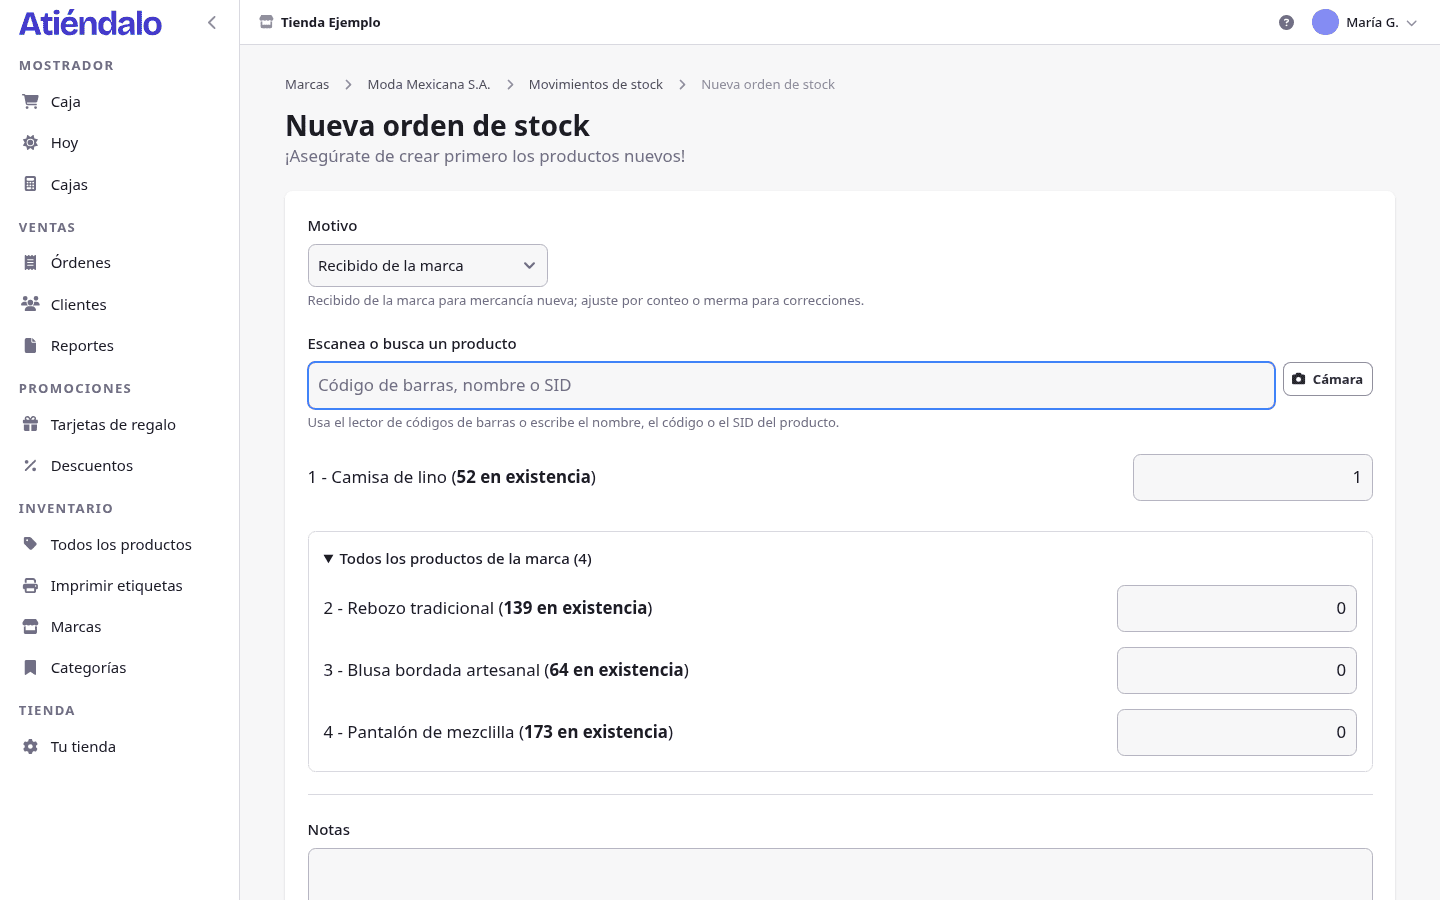
With no reader, type the product’s name, code or SID into the same box and pick it from the list; on a phone, the Camera button next to the box scans with the camera. And if you prefer to type quantities, open All the brand’s products at the bottom of the form: it is the full list with a quantity box per product.
The code you scan is looked up in this order: barcode, SKU and SID, exactly as in the CSV import.
Two messages you may see while scanning:
- “That code belongs to ‘another brand’“ — a receipt covers a single brand. Record that piece in the receipt of the brand it belongs to.
- “No product carries the code…” — next to the message a Create a product with code button appears: it takes you to the product form with the code already filled in and its type guessed (EAN-8, UPC, EAN-13 or Code 128), and saving brings you back to the receipt with the product ready as a line.
The same search box is on the return to brand document.
Importing a receipt from CSV
- On the brand page, open the ··· menu → Import receipt (CSV).
- Press Download template.
- Fill the two columns:
codigo(the product’s barcode, SKU or SID) andcantidad(negative for stock leaving). English headers work too. - Upload the file and press Import.
It is all or nothing: if any row fails to resolve, nothing is recorded and Atiéndalo tells you which row.
If the list has products that don’t exist yet, or comes as Excel, a PDF or a message, use the inventory import, which can also add to or set existing stock: Importing your inventory.
The reason on every movement
Every receipt carries a Reason, and that reason travels into the history:
- Received from brand — new merchandise.
- Count adjustment — what an applied physical count leaves behind.
- Write-off — what was damaged or lost.
- Returned to brand — written by the return document; you never pick it by hand.
Sales, customer returns and voids record themselves (Sold, Returned by customer, Sale voided). The brand’s Stock movement tab and each product’s page show the full history with its reason and the document behind it.
Negative quantities
Quantities can be negative, to record returns to the supplier or write-offs. If you send 5 pieces back to a brand, type -5 and stock adjusts.
Returning merchandise to a brand
For a formal return with a signable document, use the dedicated flow:
- On the brand’s Stock movement tab, press Return to brand.
- The form lists only the products with stock. Scan or search each piece and type how many units go back, as a positive number.
- Press Create Stock Order.
- On the document, press Print: it comes out with “delivered by” and “received by” lines for the brand to sign.
The units leave stock with the reason Returned to brand.
Labels for what just arrived
Print labels, in the sidebar, is the printing screen: one row per brand per day with the units that came in.
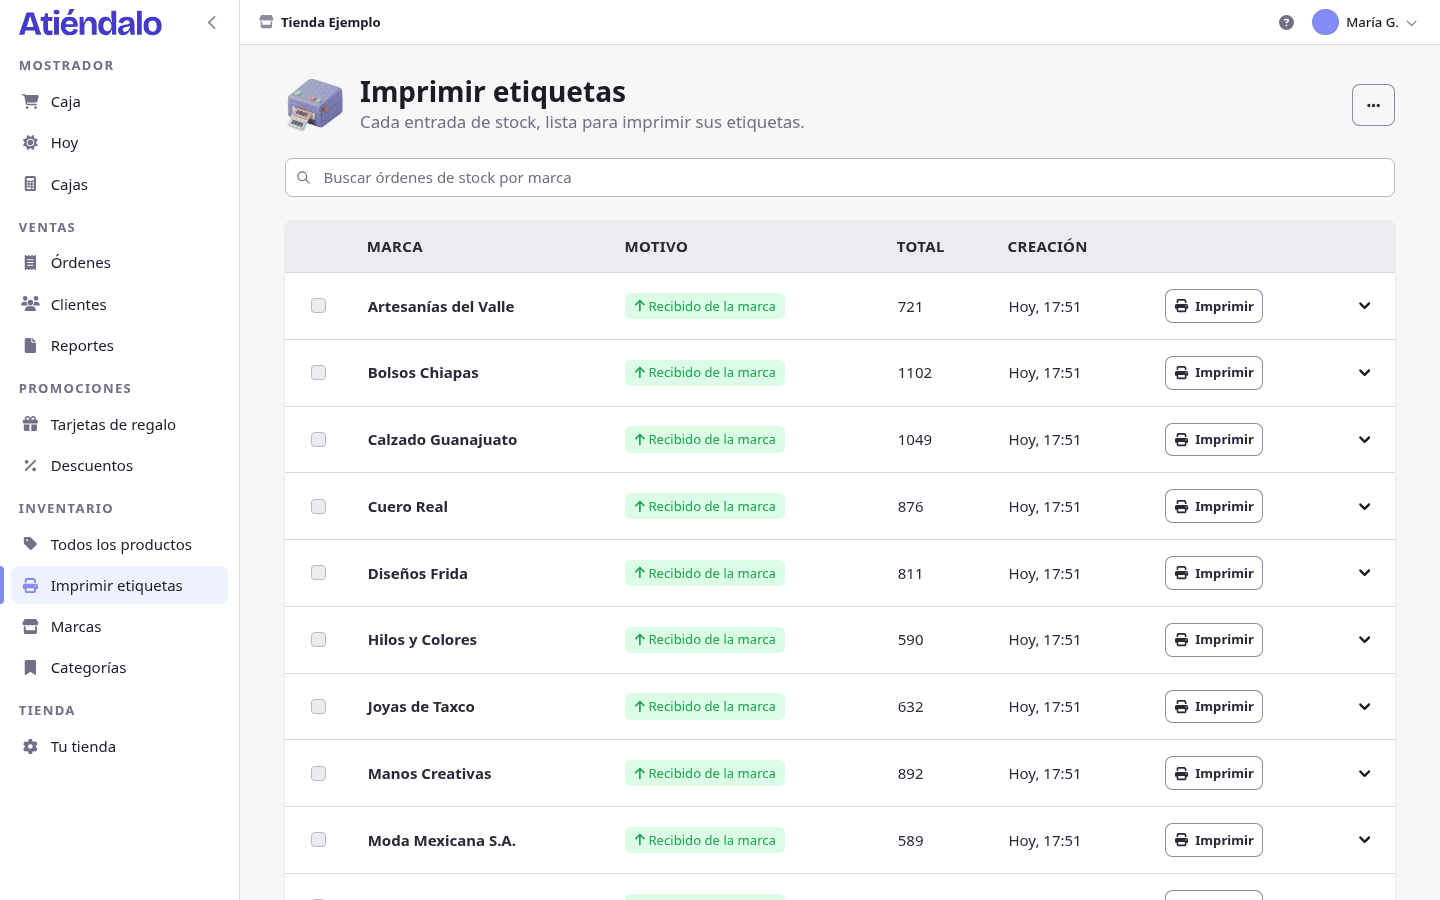
- Open Print labels.
- Press Print on the day’s row, or expand the row and use the Print of one product in particular.
- In the dialog, leave copies on One per unit received so exactly the pieces that arrived come out.
- Press Print.
You can also tick several rows and use Print labels in the selection bar, or open a receipt and use its Print N labels button. Sizes, printers and scale are covered in Labels & printers.
How stock is computed
A product’s available stock is:
total stock receipts − units in completed sales and layaways
Voided sales do not count: voiding a sale returns its pieces to stock automatically. If the number does not match physical reality, run a physical count to find the difference.
Deleting a receipt
From the receipt, Edit → the ··· menu → Delete. Its products’ stock is deducted automatically. If the receipt really happened but no longer matches reality, prefer recording a negative receipt: it keeps the history and puts the reason on the record.
What can go wrong
- You scan and nothing happens. The cursor is in a quantity box, not in the search box. Click Scan or search a product and scan again; if the reader never responds, go to Scanners & barcodes.
- “That code belongs to another brand”. You are receiving into the wrong document. Save what you have and open the receipt of the brand that owns the piece: a receipt never mixes brands.
- The same product ended up on two lines. That happens if you added it from the catalogue below and also scanned it. Set one of them to 0 or remove the line before saving; the two add up.
- The import recorded nothing. It is all or nothing: a single row with an unknown code or a zero quantity cancels the whole receipt. Fix that row and upload again.
- You received twice what actually arrived. Don’t edit the product: record another receipt with a negative quantity and reason Write-off or Count adjustment, or delete the receipt if it is from today and nothing has sold from it.
- Fewer labels printed than units received. The dialog was on One per product. Switch it to One per unit received and print again.